Firebase Authentication part 1
1. Firebase Authentication 설정
Firebase Authentication으로 로그인 기능을 만들어보자.
만들었던 프로젝트를 눌러보면 왼쪽 메뉴에 빌드 탭이 보일것이다. 빌드 탭 안에 Authentication을 누르자.
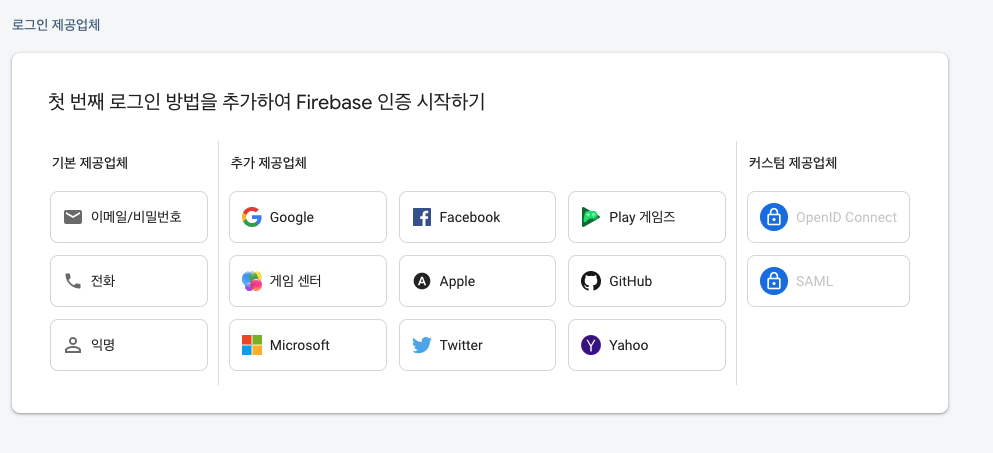
시작하기 버튼을 누르면 이 페이지를 보고 있을 것이다. 지금은 이메일/비밀번호 기능만 사용할 것이므로 이메일/비밀번호 버튼을 누른다.

위에 거만 체크하고 저장 버튼을 누른다.
사용 설정이 완료되었다는 문구가 보이면 이제 React로 넘어간다.
2. Firebase Authentication 적용
전에 만들었던 Firebase.js 파일에서 하나를 추가한다.
import { initializeApp } from "firebase/app";
import { getAnalytics } from "firebase/analytics";
import { getAuth } from "firebase/auth";

const firebaseConfig = {
  apiKey: "",
  authDomain: "jiniushoes.firebaseapp.com",
  projectId: "jiniushoes",
  storageBucket: "jiniushoes.appspot.com",
  messagingSenderId: "287778600778",
  appId: "1:287778600778:web:0d1c70fed72dbd0f76b3b3",
  measurementId: "G-VFXLGS9BDP"
};

const app = initializeApp(firebaseConfig);
const analytics = getAnalytics(app);
export const auth = getAuth();
getAuth() 함수를 이용하여 다른 파일에서 쓸 수 있게 export한다.
3. 회원가입 구현
Enroll.js 파일을 만들어 간단하게 이메일과 비밀번호를 이용하여 회원가입을 구현한다.
import { useState } from "react";
import { Button, Grid, TextField } from "@mui/material"
import { useNavigate } from 'react-router-dom';

const Enroll = () => {
    const navigate = useNavigate();
    const [email, setEmail] = useState("");
    const [password, setPassword] = useState("");

    const onChange = (event) => {
        const { target: { id, value } } = event;
        if (id === "email") {
            setEmail(value)
        } else if (id === "password") {
            setPassword(value)
        }
    }

    return (
        <Grid
            container
            columns={{ xs: 12, sm: 12, md: 12 }}
            spacing={4}
            direction="column"
            justifyContent="center"
            alignItems="center"
            style={{ marginTop: 10 }}
        >
            <Grid item xs={12}>
                <TextField
                    id="email"
                    label="Email"
                    onChange={onChange}
                    variant="standard"
                    style={{ width: 200 }}
                />
            </Grid>
            <Grid item xs={12}>
                <TextField
                    id="password"
                    label="Password"
                    onChange={onChange}
                    type="password"
                    variant="standard"
                    style={{ width: 200 }}
                />
            </Grid>
            <Grid item xs={12}>
                <Button
                    variant="contained"
                    style={{ width: 200, backgroundColor: "white", color: "black" }}
                >
                    회원가입
                </Button>
            </Grid>
        </Grid>
    )
}

export default Enroll;
정말 간단하게 UI를 만들고 이제 Firebase Authentication을 넣어보자.
import { useState } from "react";
import { Button, Grid, TextField } from "@mui/material"
import { useNavigate } from 'react-router-dom';

import { createUserWithEmailAndPassword } from "firebase/auth";
import { auth } from "../Environment/Firebase";

const Enroll = () => {
    const navigate = useNavigate();
    const [email, setEmail] = useState("");
    const [password, setPassword] = useState("");

    const onChange = (event) => {
        const { target: { id, value } } = event;
        if (id === "email") {
            setEmail(value)
        } else if (id === "password") {
            setPassword(value)
        }
    }

    const onClickEnroll = () => {
        createUserWithEmailAndPassword(auth, email, password).then((userCredential) => {
            const user = userCredential.user;
            console.log(user);
        }).catch((error) => {
            const errorCode = error.code;
            const errorMessage = error.message;
            console.log(errorMessage);
        });
    }

    return (
        <Grid
            container
            columns={{ xs: 12, sm: 12, md: 12 }}
            spacing={4}
            direction="column"
            justifyContent="center"
            alignItems="center"
            style={{ marginTop: 10 }}
        >
            <Grid item xs={12}>
                <TextField
                    id="email"
                    label="Email"
                    onChange={onChange}
                    variant="standard"
                    style={{ width: 200 }}
                />
            </Grid>
            <Grid item xs={12}>
                <TextField
                    id="password"
                    label="Password"
                    onChange={onChange}
                    type="password"
                    variant="standard"
                    style={{ width: 200 }}
                />
            </Grid>
            <Grid item xs={12}>
                <Button
                    variant="contained"
                    onClick={onClickEnroll}
                    style={{ width: 200, backgroundColor: "white", color: "black" }}
                >
                    회원가입
                </Button>
            </Grid>
        </Grid>
    )
}

export default Enroll;
onClickEnroll을 만들어 회원가입 버튼을 눌렀을 때 유저가 입력한 아이디와 비밀번호로 회원가입을 진행하고 콘솔로 확인해봅시다.

test1@naver.com이라는 이메일로 회원가입을 시도했고 콘솔에는 객체 하나가 만들어진 듯 해보인다. Firebase Authentication으로 이동하여 잘 추가가 되었는지 확인해보자.

마찬가지로 추가가 잘 되었다. 코드를 보면 회원가입이 잘 진행되었을 때 만들어진 객체를 콘솔에 찍어보고 있으나 에러가 발생하면 에러 메세지를 콘솔로 보여주고 있다. Firebase Authentication에서 발생하는 에러는 서버 에러나 중복 이메일, 이메일 형식이 아닌 경우에 발생하는 것 같다. 회원가입을 구현했으니 다음은 로그인과 로그아웃 회원탈퇴까지 구현해보자.